
Share This
Selection Process and Cleaning
Not too long ago we where talking about the older WRX's and how inexpensive they are getting in the used car market. So after some discussions we thought it would be fun to find a good example and build it on a budget (about $15k including the car). What we expect in this project is a car that will be reliable and pass all emission testing. On top of that it has to be FUN not so much a 12 second car but something you can enjoy driving to work and still be able to go play on a sunny day. But we are definitely happy if we can turn 12's.
Step one is finding the "right" WRX. We looked at a dozen or so examples that included wagons and sedans from $9k - $13k.
Here€™s a couple examples of potential WRX that were close to what we were looking for but because of over all condition or based on the cost to repair ruled them out.
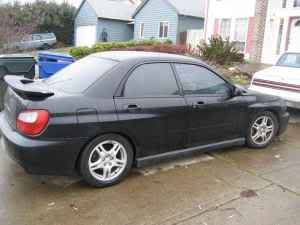

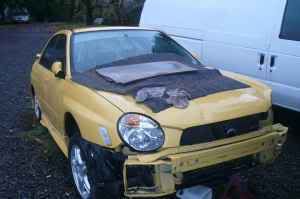
Some of these cars had interior damage that obviously came from a large dog chewing on every chewable part while others had been seemingly dimpled like a golf ball on the exterior with not one straight panel. Finally we came across the right one for our project. It is the rarest color for 2002 (Blaze Yellow) and with no major damage it was the one. It even had a few extra goodies that could be used or sold to add to the build. After paying the small fee of $10,000 we were able to start the drive home.
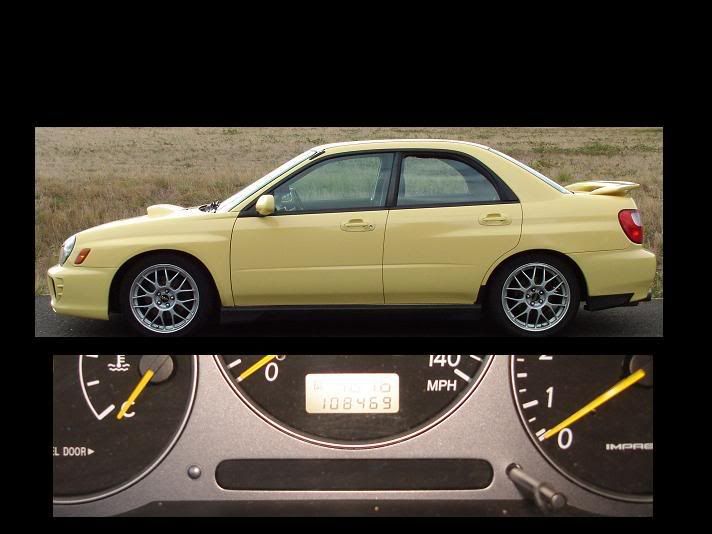
Honestly the car was in good condition but it badly in need of a bath and there was a strong odder of funk coming from somewhere. All in all out of the 12 or so that we looked at it was the best choice for us and our budget of $15K
Lesson learned so far if you€™r willing to search and put in some sweat equity you can find a very nice and inexpensive WRX on the used market.
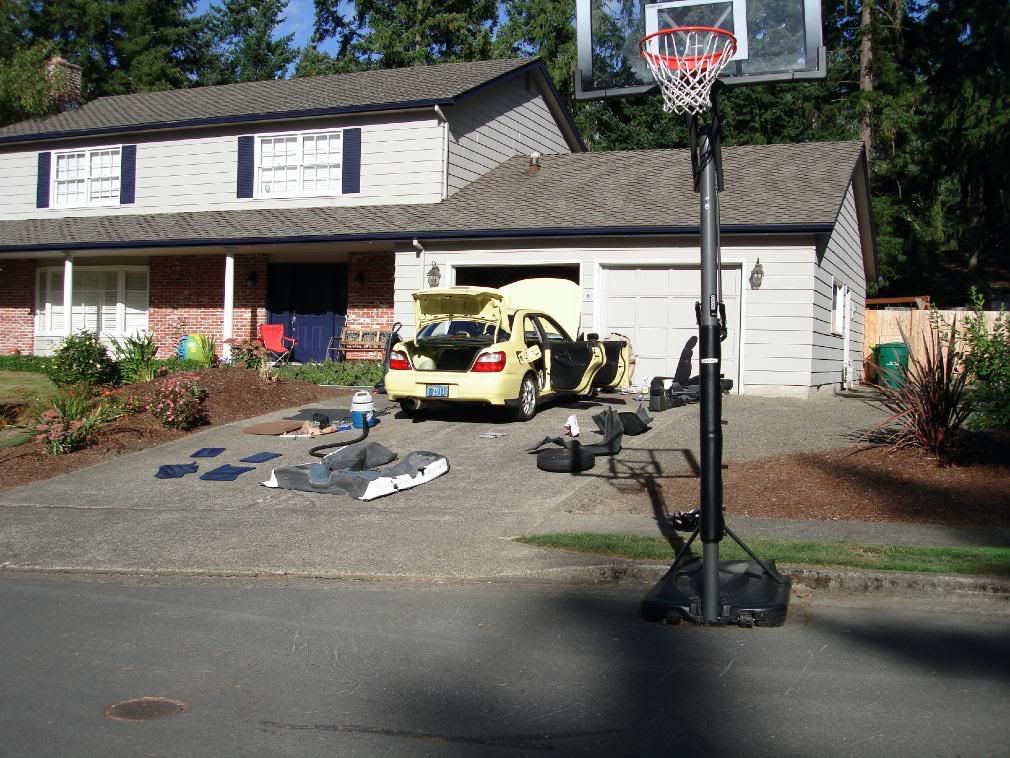
The Clean up - The first step was to clean this thing up and get rid of the smell.
Time to address the paint, even with a relatively €œokay€ body the paint was in pretty oxidized and contaminated condition. The paint felt like sand paper, if we dragged a towel over it the crap on the paint would actually snag the towel. After a thorough wash we clay bar the entire car, mirrors windows and everything. Clay is amazing, at first we where skeptical that we could revive the paint. After claying the paint really started to show potential. The next step was an abrasive polish, this removed the remaining contaminants and removed the oxidation wile getting us excited at the same time. After the aggressive polish came a fine swirl removing polish, this smoothed the finish to better than new feel. To protect the paint we finished with a layer of wax that will protect the revived finish through the coming fall months.
The second step was to be able to drive down the road and not pass out because of the smell. After completely removing the entire interior for a good cleaning we found that there was a leak on the passengers side. The previous owner/owners installed an aftermarket down pipe and in the process cut the AC condenser €œdrip hose€ to short and it caused a leak to form in the passengers compartment. This was the cause of the smell and also the cause of our new mildew situation. After repairing the drip hose and a little extra scrubbing it was time to put everything back together. All in all we spent about a weekend scrubbing and buffing the car but let me tell you it was well worth it.
What we got on day one: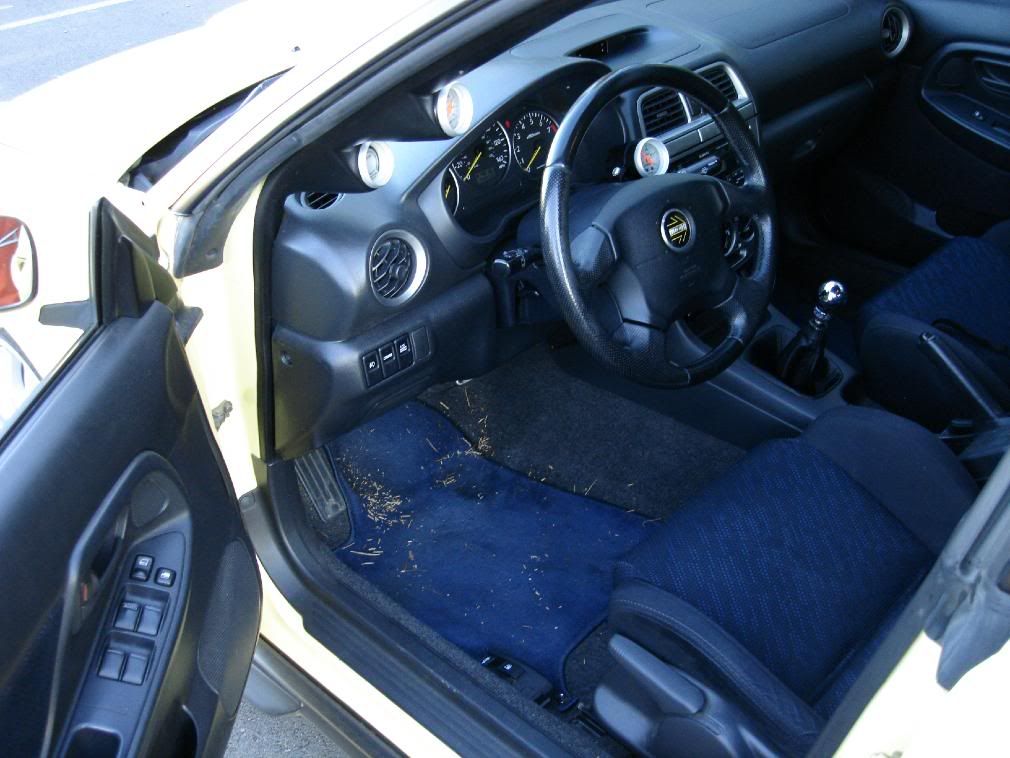
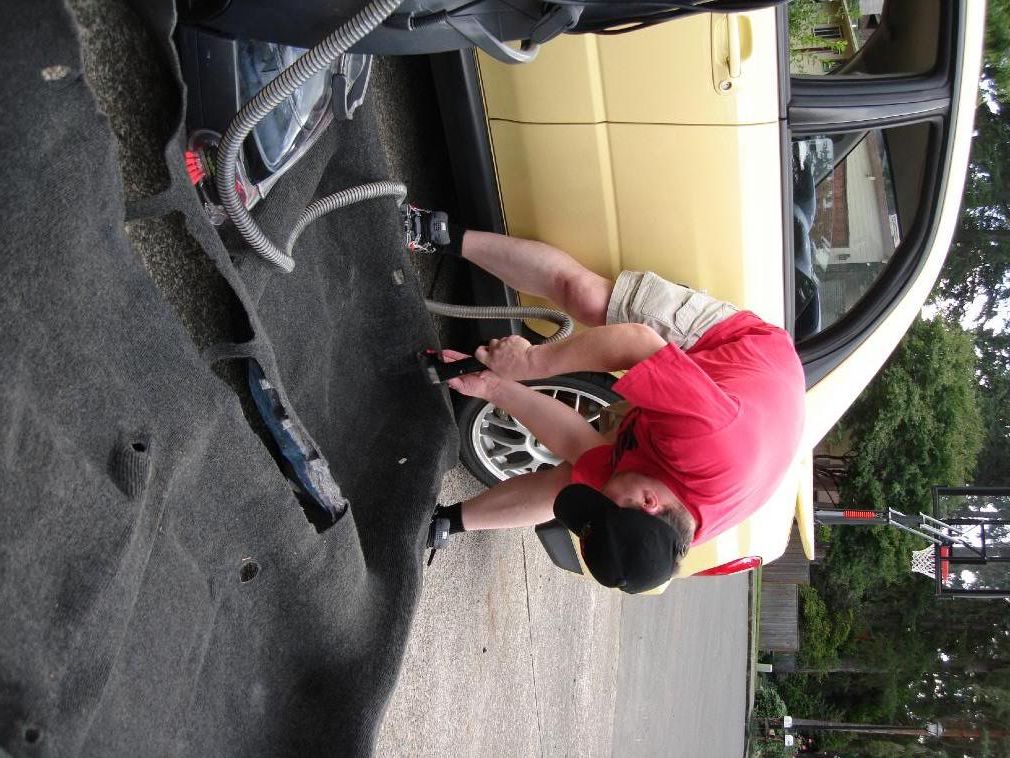
Let the cleaning begin: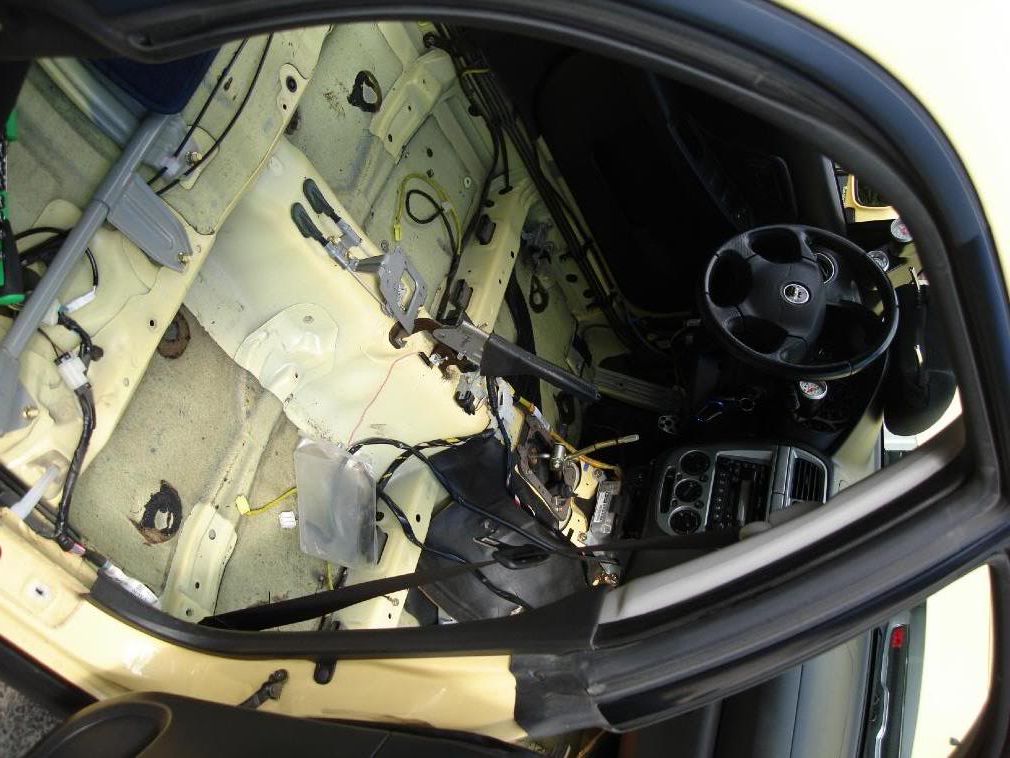
While cleaning things out we found $1.22 in change to put back into the the build budget.
Additionally the car needed some paint less dent removal to get rid or minimize the door and parking lot sores, the WRX really looks amazing! It€™s now a car that anyone would be proud to drive.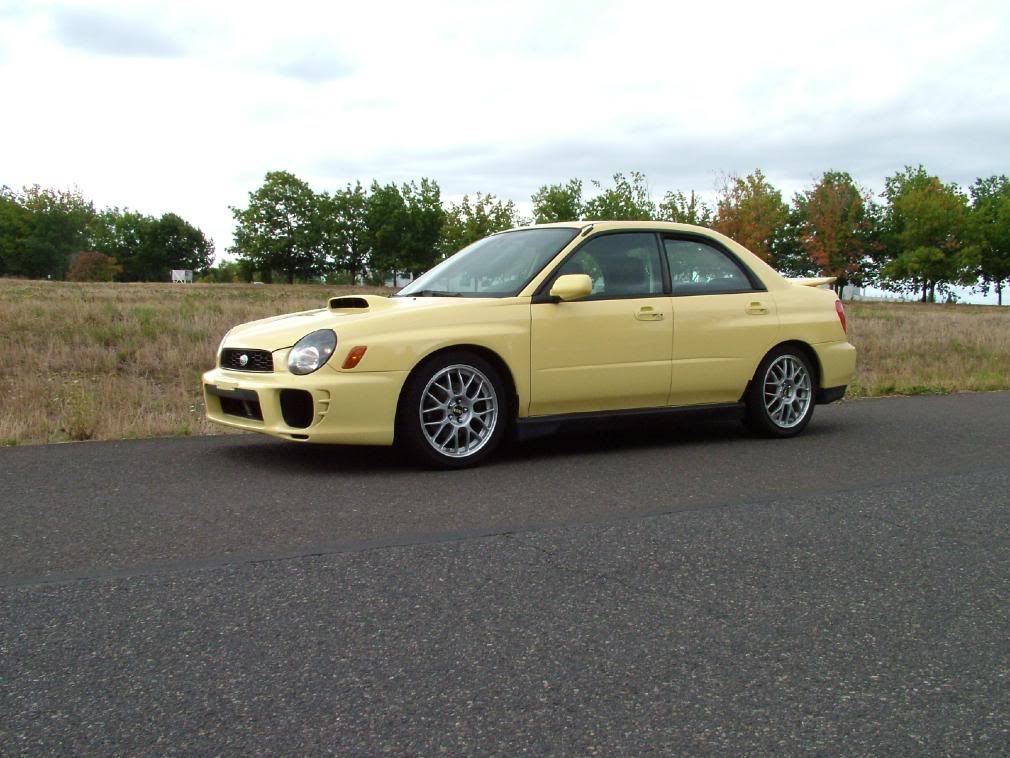
DIY Perrin Rear Differential Cover Installation
While changing all of the fluids on PERRIN Project 15K we decided that we would take advantage of the situation and not only change the differential fluid but also add a little style and functionality to the rear end. Our rear diff cover is made from high strength, heat-treated cast aluminum. We've incorporated cooling fins into the design helping to reduce oil temps, in addition to looking good and cooling the oil better we've also increased the oil capacity more than 30% over stock. For a little more info click here.
Needed tools and gear:
1) New differential gasket (Can be purchased from any local Subaru dealer)
2) 1/2" drive wrench
3) 17mm wrench or socket
4) 14mm socket
5) Jack and jack stands
This is a very straight forward installation that can be done on either a commercial vehicle hoist or floor jack.
Step 1) Raise vehicle to desired height allowing you enough room to move freely. For this you will want to use jack stands to support the vehicle while removing and installing the differential cover. NEVER WORK ON A VEHICLE SUPPORTED ONLY BY A JACK.
Step 2) Once the vehicle is raised to the desired height you will want to use the 1/2": drive wrench to remove the lower "drain plug". You will also want to remove the upper "fill plug" at this time as well. Place these two plugs aside to be reinstalled later.
Step 3) Time to remove tension from the differential, this will allow you to remove the studs connecting the differential to the cross support. You'll need to get a floor jack for this next step. Placing the jack under the differential you'll want to raise the differential roughly .5".
Step 4) Using a 17mm socket remove the 17mm nuts securing the differential to the cross support. Remove the studs from the differential and the cross support by using the "Jam-Nut" method. (this is where you "jam" 2 17mm nuts together on one stud. Then you can remove the stud by unscrewing the nut closest to the differential). Repeat this process on the remaining stud. If this method doesn't work you'll have to use a stud-extracting tool.
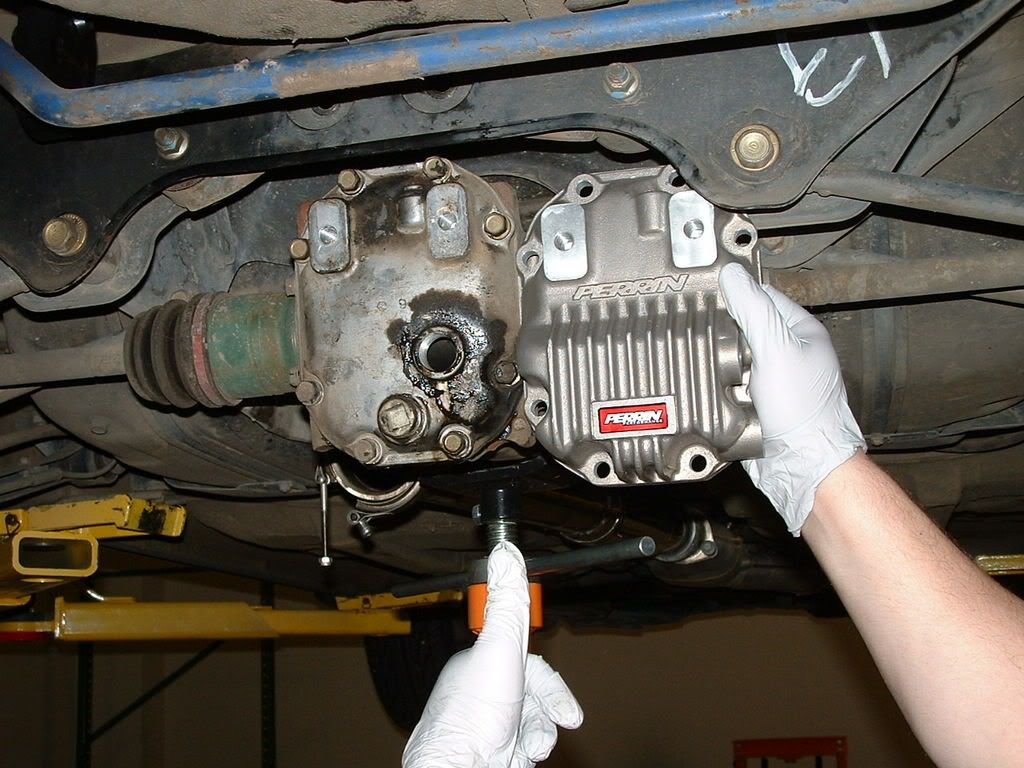
Step 5) Once the two studs are removed from the differential and the cross support, its time to lower the differential. If needed you may want to remove or lower the exhaust system allowing yourself more working room. Because our vehicle had a differential skip plate we had to remove the exhaust. You now should see and have access to all 8 14mm bolts securing the differential cover to the differential. Using a 14mm socket remove the bolts. (NOTE: WHILE REMOVING THE DIFF COVER THERE WILL BE ADDITIONAL OIL THAT WILL BEGIN TO COME FROM THE BOTTOM OF THE DIFFERENTIAL). Once the cover is removed you'll want to wipe out as much excess oil from the differential as possible.
Step 6) Once everything is clean you can place THE NEW DIFFERENTIAL GASKET to the PERRIN differential cover. Using the 8 14mm bolts remove earlier loosely place the cover back into place. Starting at the top two bolts tighten the bolts to 21.7ft-lbs.
Step 7) Raise the differential back into place using the floor jack. Once the differential is in place (you'll be able to tell because the differential nut holes will line up with the cross support holes). With everything lined up you'll want to place and tighten the two bolts/nuts removed earlier to 52ft-lbs. Before doing this thread studs into differential cover until they are bottomed out.
Step 8) Reinstall the lower drain plug into the newly installed PERRIN differential cover. Tighten this drain plug using the ½" drive wrench to 36.2ft-lbs.
Step 9) Fill differential with proper high quality gear oil until oil starts to drip from the upper fill hole. Install the upper plug and tighten to 36.3ft-lbs.
Step 10) Lower vehicle and take it for a test drive. Check for oil leaks after the test drive.
Perrin Rear Differential Subframe Lockdown System DIY
As some of you may or may not know, we here at PERRIN have taken on a little project called Project $15K. This is where we take a 2002 WRX and build the ultimate daily driver. After washing it and cleaning everything up it was time to change out all of the fluids. While doing this we decided that we should install our SLS.
Adding the PERRIN Subframe Lockdown System adds rigidity and stability to the rear end diff. This kit eliminates all driveline slop and the annoying thud that can be heard shifting from first to second. The results can be felt the first time you take off from a stop light at almost any speed. I have to say that this has to be one of the best "bang for your buck" mods I have ever done. For more information click here.
Needed tools:
1) 12mm socket or wrench
2) 17mm socket or wrench
3) Jack and Jack stand
Step 1) Raise the vehicle to a desired height allowing you enough room to move freely. For this you will want to use jack stands to support the vehicle while working on the cross support. NEVER WORK ON A VEHICLE SUPPORTED ONLY BY A JACK.
Step 2) Time to remove tension from the differential, this will allow you to lower the differential stabilizer. You'll need to get a floor jack for this next step. Placing the jack under the differential you'll want to raise the differential roughly .5".
Step 3) Using a 17mm socket remove the 17mm nuts securing the differential to the cross support. Remove the studs from the differential and the cross support by using the "Jam-Nut" method. (this is where you "jam" two 17mm nuts together on one stud. Then you can remove the stud by unscrewing the nut closest to the differential). Repeat this process on the remaining stud. If this method doesn't work you'll have to use a stud-extracting tool.
Step 4) Once the two studs are removed from the differential and the cross support you will remove the two 17mm bolts and nuts securing the differential stabilizer to the rear sub frame. Its now time to lower the differential, you will only need to lower it slightly to allow for clearance. If needed you may want to remove or lower the exhaust system allowing your self even more working room.
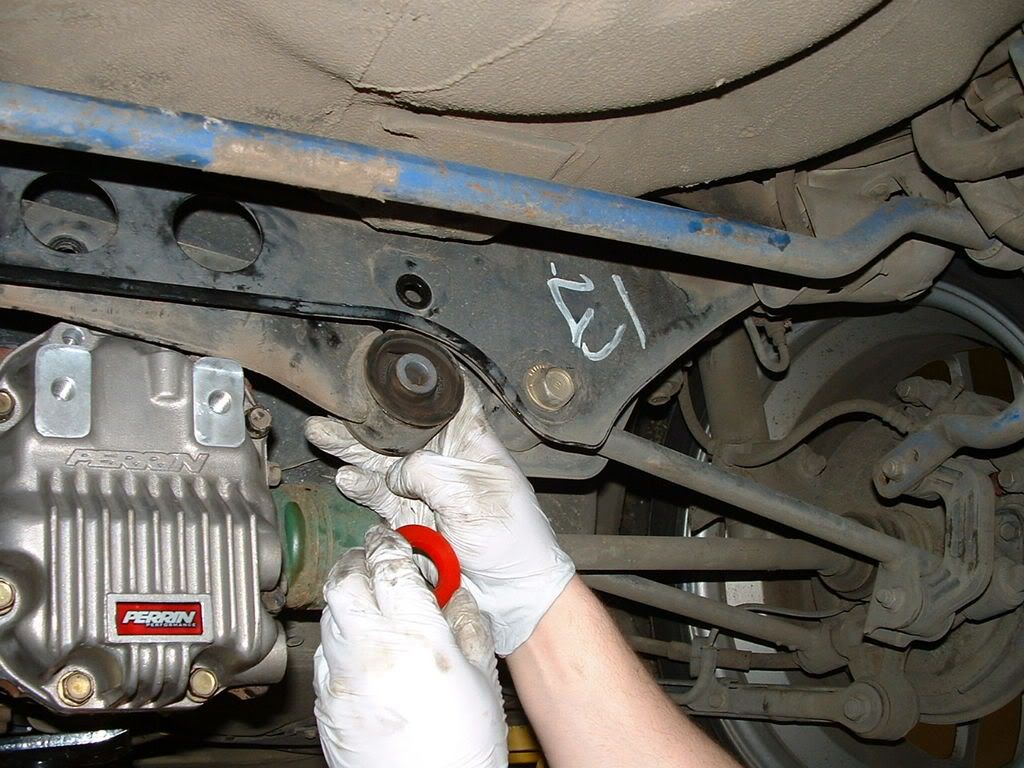
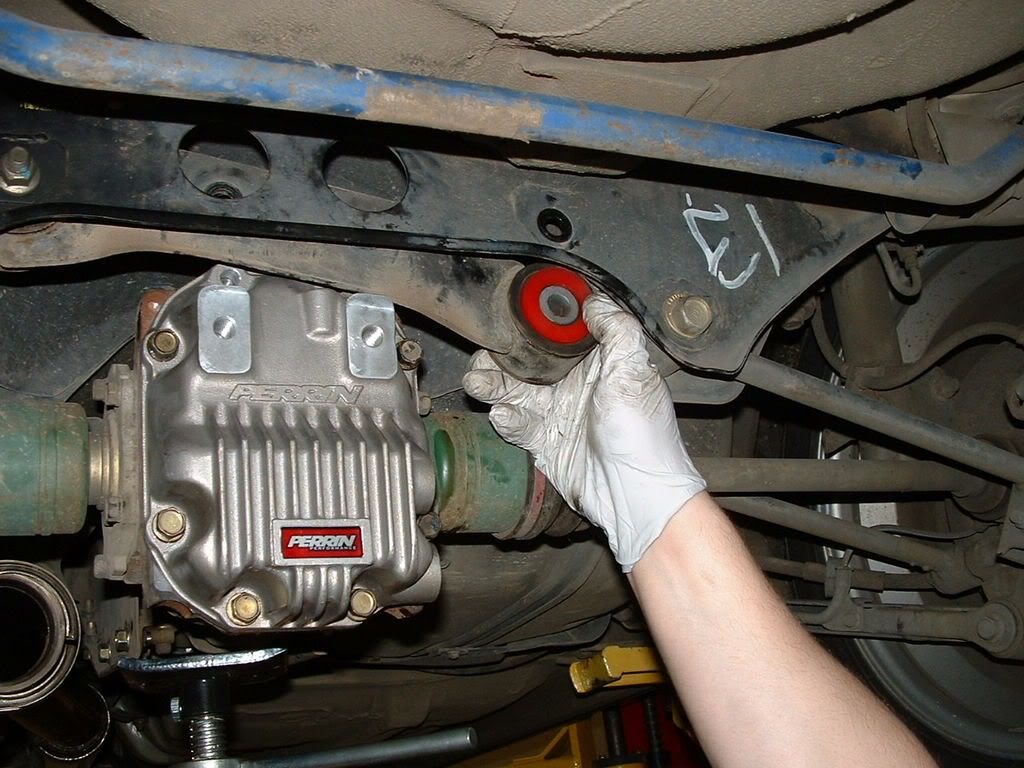
Step 5) Remove or lower the differential stabilizer from the sub frame. After you have done this you can install the 4 smaller red urethane bushings around the OEM Bushings center mounting points. (2 bushings installed on each side)
Step 6) After all 4 of the PERRIN bushings are in place you can now reinstall the differential support brace into the chassis. (Don't fully tighten just yet)
Step 7) Raise the differential back into the car, line up the stud holes with the differential support holes and reinstall the studs.
Step 8) Tighten the differential stabilizer support bolts to 70ft-lbs. Now go back and tighten the nuts on bolts on the sub frame to 70ft-lbs.
Step 9) Time to install the rear sub frame lock out bolts. You'll want to locate the empty threaded holes on the rear sub frame. Screw the bolt and bushing into the empty hole on each side of the car. Tighten the bolts down to 60ft-lbs. (BOLTS AND SPACERS MAY MAK SOME POPPING SOUNDS WHILE THE BOLTS ARE BEING TIGHTENED INTO THE CHASSIS, THIS IS NORMAL)
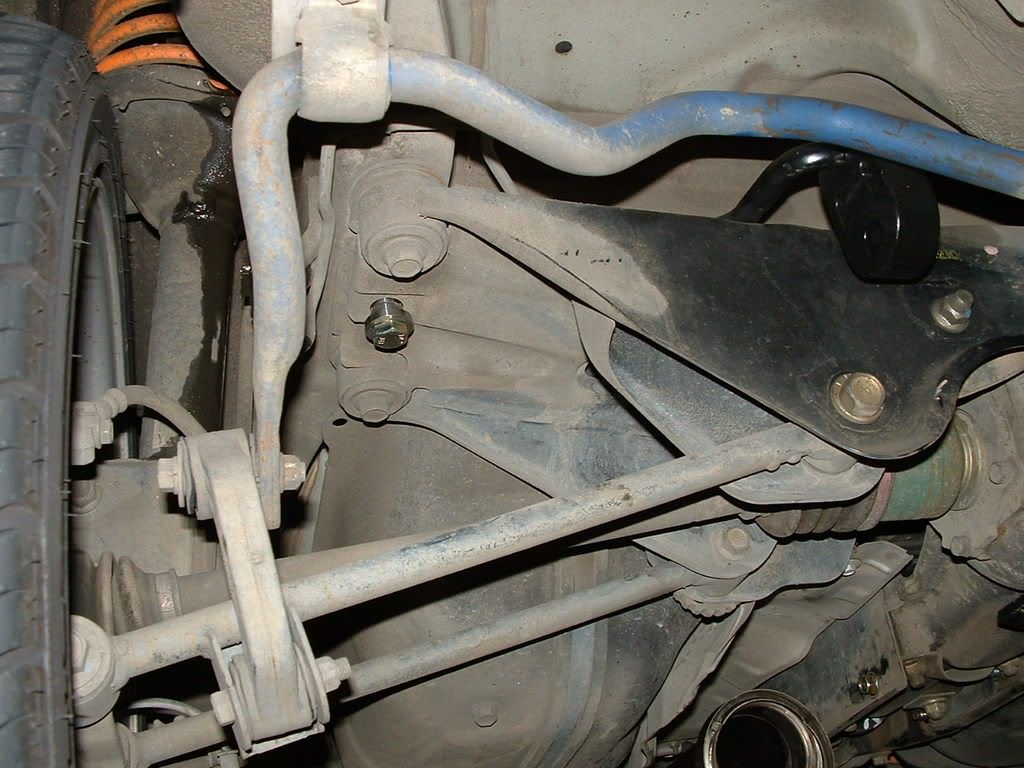
Step 10) Locate the differential front support beam and the 2 outer bolts securing it to the chassis. Remove the passenger side large bolt securing the front support beam to the chassis, and the two bolts securing the plate to the chassis.
Step 11) Pull down the front support brace until there is enough room to place the new bushings on top of the OEM bushings.
Step 12) Reinstall the plate back onto the chassis and tighten the 12mm bolts to 25ft-lbs. Install the large 17mm bolt through the bushings and tighten to 100ft-lbs.
Step 13) Repeat step 10, 11, and 12 on the drivers side.
Step 14) Lower vehicle and test drive.