
Share This
It's a love hate relationship with any new model of car that comes out. You either love it, or hate it, but eventually it grows on you. I personally love the hatchback look from the side, and front, but the back is a little scary. But a few simple things can fix that. Getting rid of the chrome parts for painted or black out parts is a huge part of the formula. Then lower it a bit with some nice wheels, and the car really starts to pop.
We have had our car for a couple months now, and we figure we would show you some of the progress we are making, and show our path to getting ready for its public debut at the 2008 Street tuner challenge. So what would we be building for the 2008 WRX show car?? Well, everything! The formula to build the show car is simple, turbo, FMIC, turbo back exhaust, fuel system that would support 500WHP, bigger swaybars, coilovers, and nice sticky wide tires, and good engine management. While this list is easy to create in words, to create physical parts and do in about 2 weeks is the hard part.
Our car started life out as a 2008 WRX with the premium pack, and a whopping 14miles on the tripmeter. Because they were hard to come by at the time, Subiesport Magazine used our hatchback and sedan for the latest Subiesport issue.
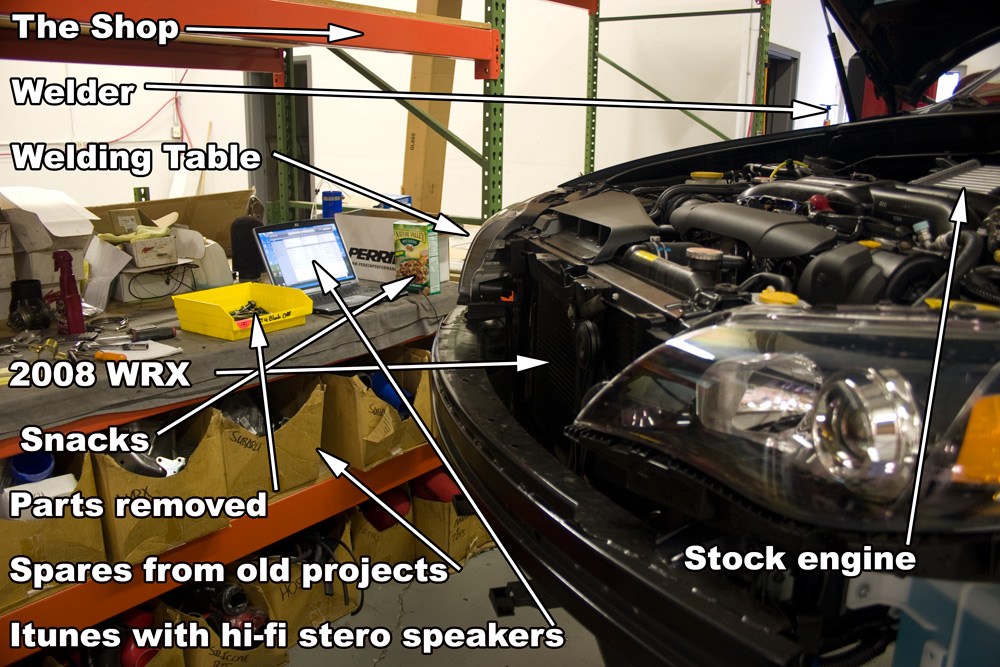
While we just moved into a nice big new building, our "Shop" was still at the old shop. While this was a pain in the butt to drive back and forth, it was nice to have no distractions, and peace and quiet. While the shop was a little sparse, it had all the essentials to create everything we needed.
EXHAUST
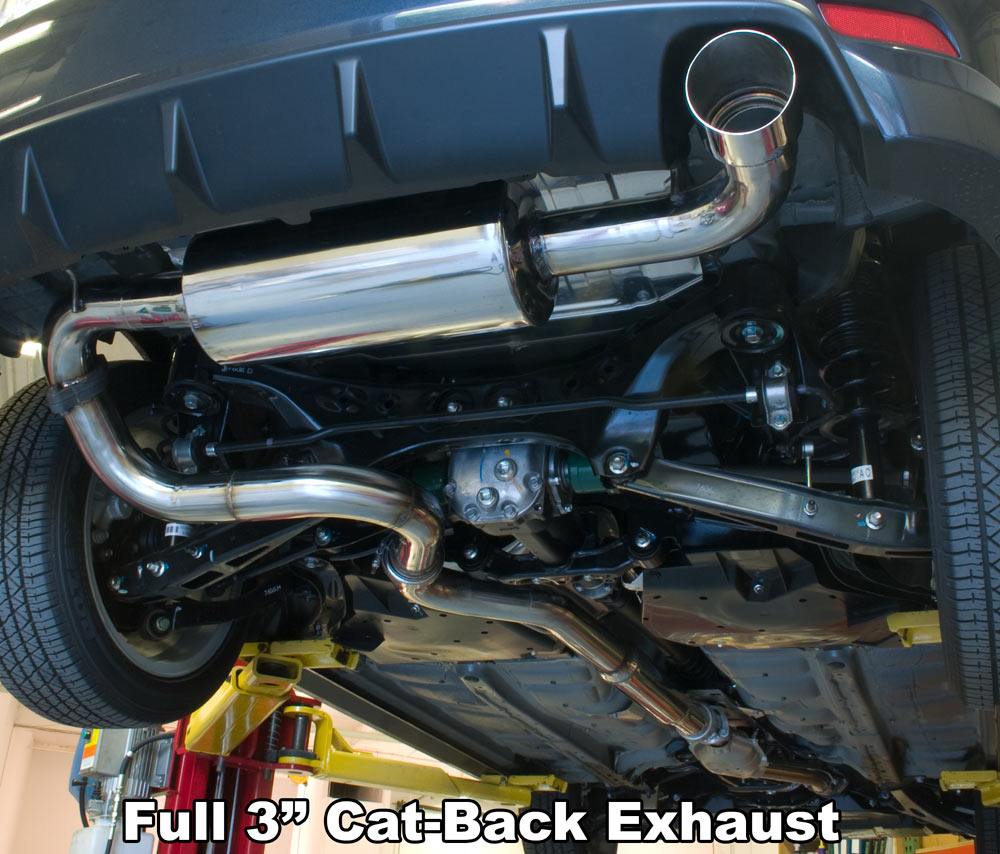
First off the exhaust. Not much to do here other than make a 3€ system thats quite! Like our other exhaust systems, 3€ mandrel bent 304SS tubing was used, along with a straight through 3€ muffler. Even though this was a prototype, it would be seen by many people so I end up polishing the tubing to represent what the final product would look like.
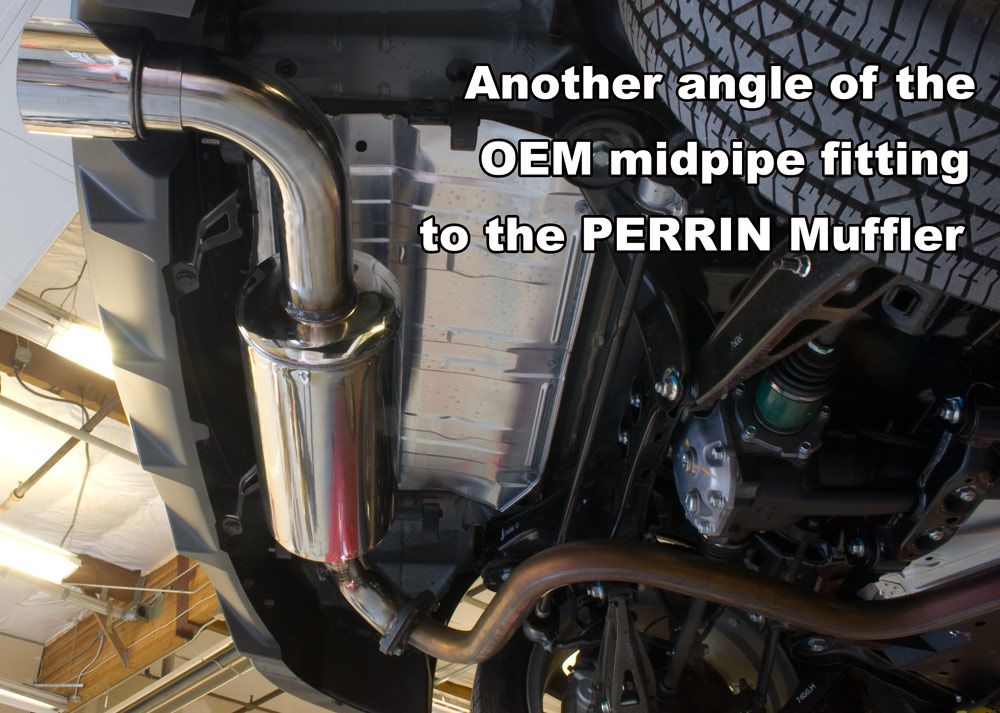
OEM midpipe bolted to PERRIN 2008 WRX Muffler. This makes the car sound very mellow, but that cool Subaru Boxer sound finally starts to come out.
In some of the pics you will notice the system is bolted to an OEM exhaust. This is a new feature we are trying to incorporate into a lot of our new exhausts. This allows then end user to buy just the muffler, for some more sound, or buy just the center section to get some power, but keep things super quiet.

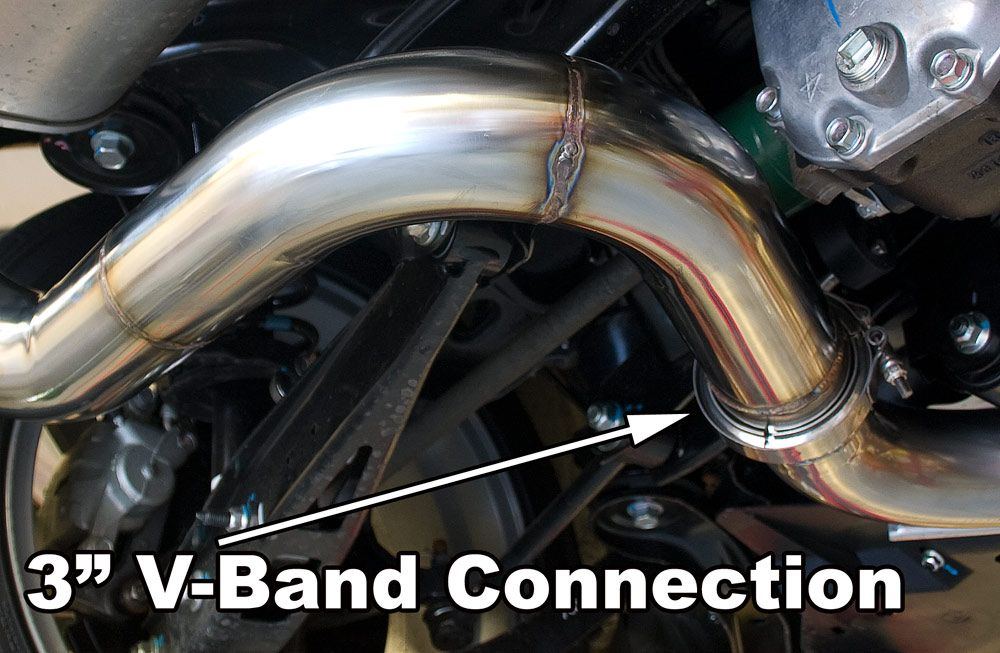
Another feature everyone will see in every exhaust system coming out is a V-band connection. This is a great way to make the system easier to package and provide an adjustable and gasketless connection.
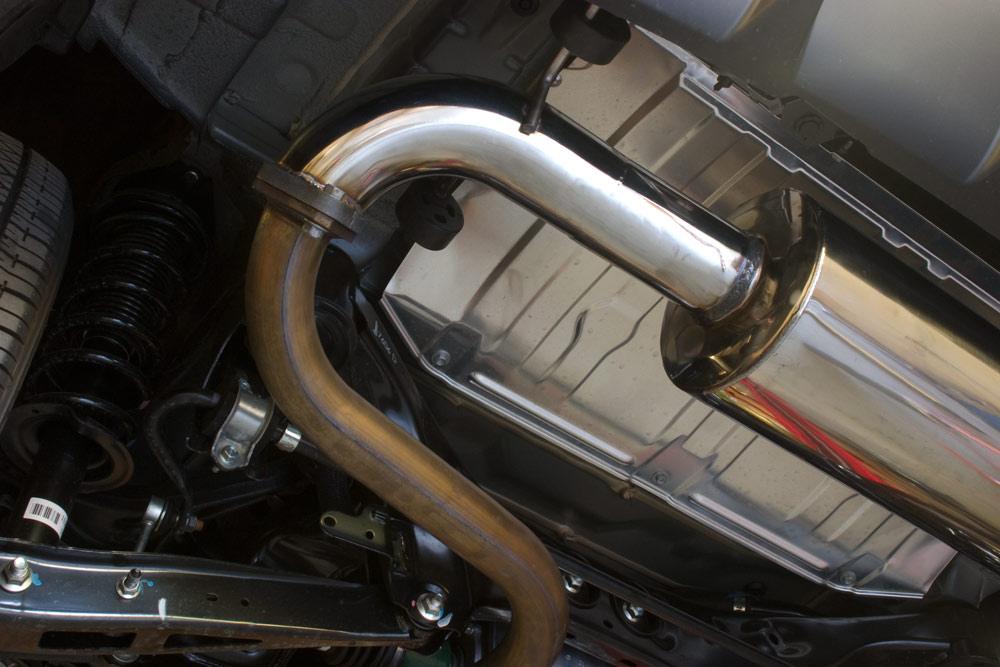
The exhaust for the 2008 WRX is very different than any other Subaru in that the muffler transversely mounted. While this adds some more complexity to the system, it adds a new look to the back of the car. Now you can see the side of the muffler and the huge 3€ tubing. Subaru obviously did this to cut down space needed behind the rear wheels to help shorten the car.

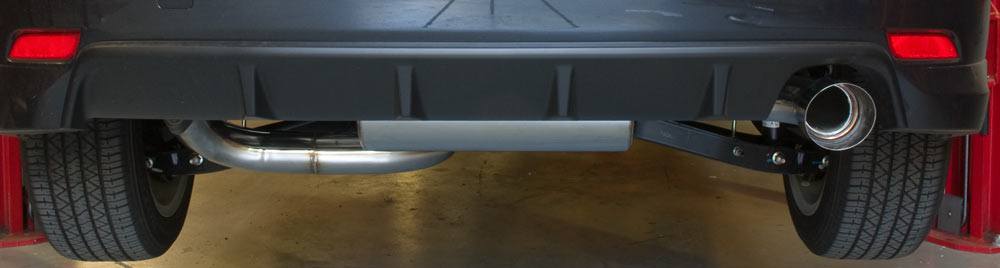
This shot represents what you might see driving down the road from behind.
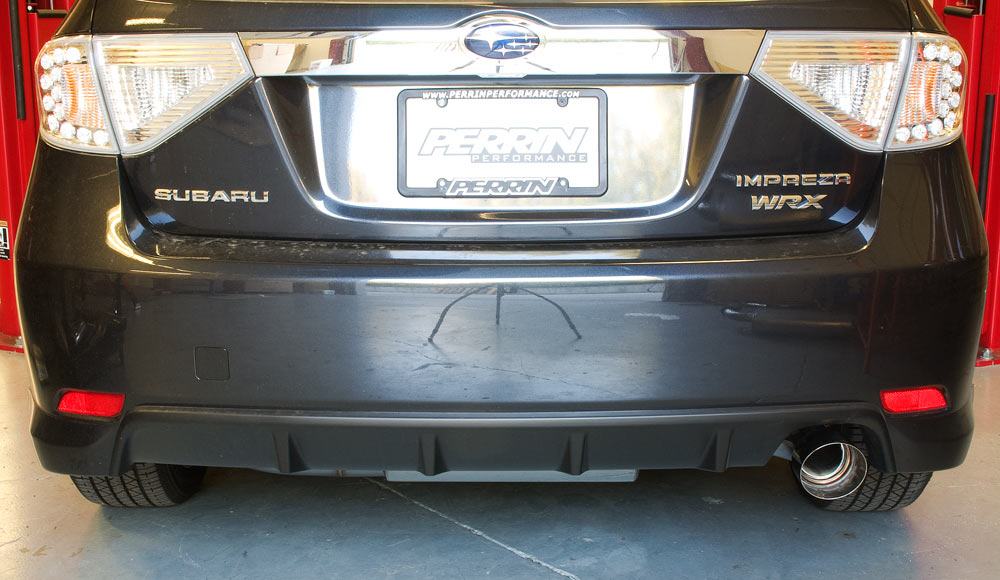
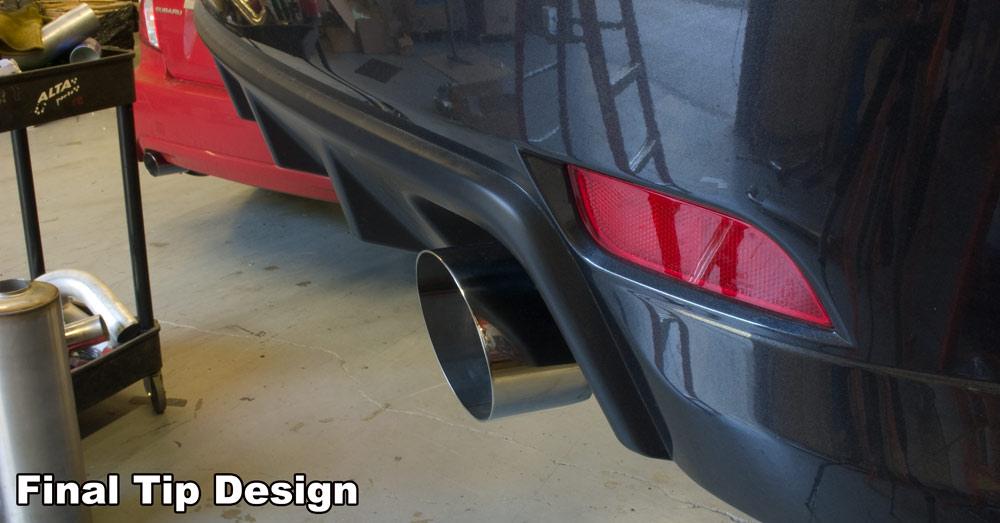
From the back of the car, the muffler and the 3" tubing really shows up. Can't wait to see what we can do with the STI!
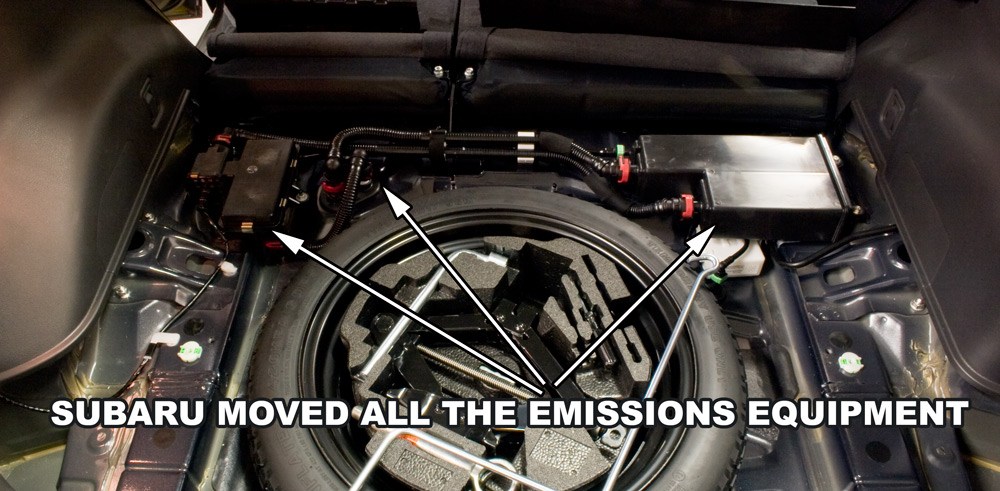
On a side note, all the emissions related items (like the charcoal canister, and evap control solenoids) are moved to the inside of the car under the trunk's floor. Again Subaru moved this more toward the middle of the car to get more weight centrally located in the chassis. One more note, the gas tank is under the back seat, not behind it! Again more weight moved to the middle. All of this starts to makes sense as the car (in stock form) seems to rotated better and handle better than previous models.
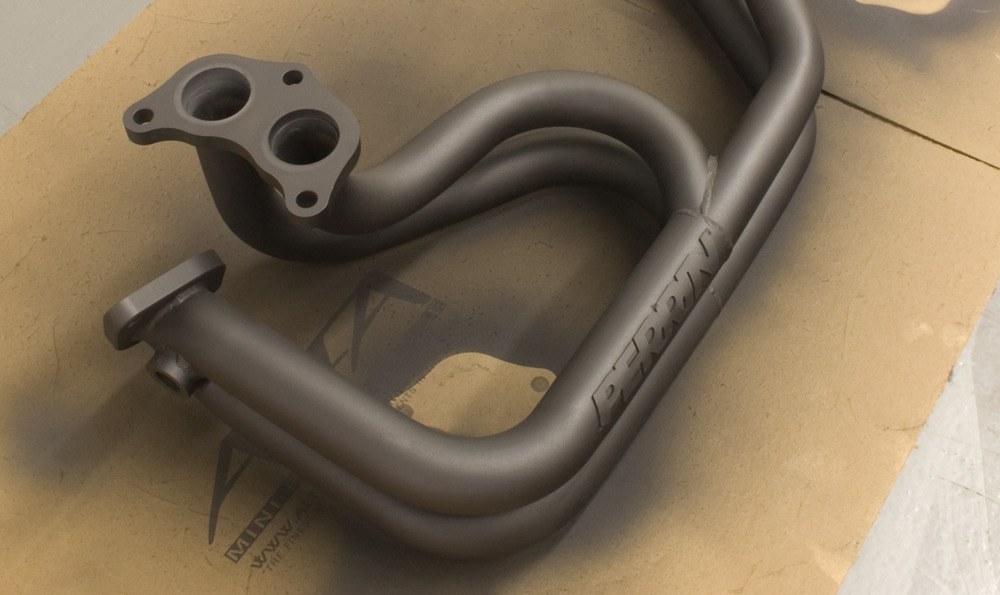
A set of PERRIN headers were used which are proven to gain HP across the RPM and increase spool RPM. The only difference is I coated the with VHT 2000 degree ceramic paint. I have been using this product on the last few projects with great success. Its simple, just clean the part really well, and spray it like paint. And for $8 a can you can€™t go wrong. While I was coating the header, I figured I would coat the exhaust housing, and uppipe to the turbo kit.
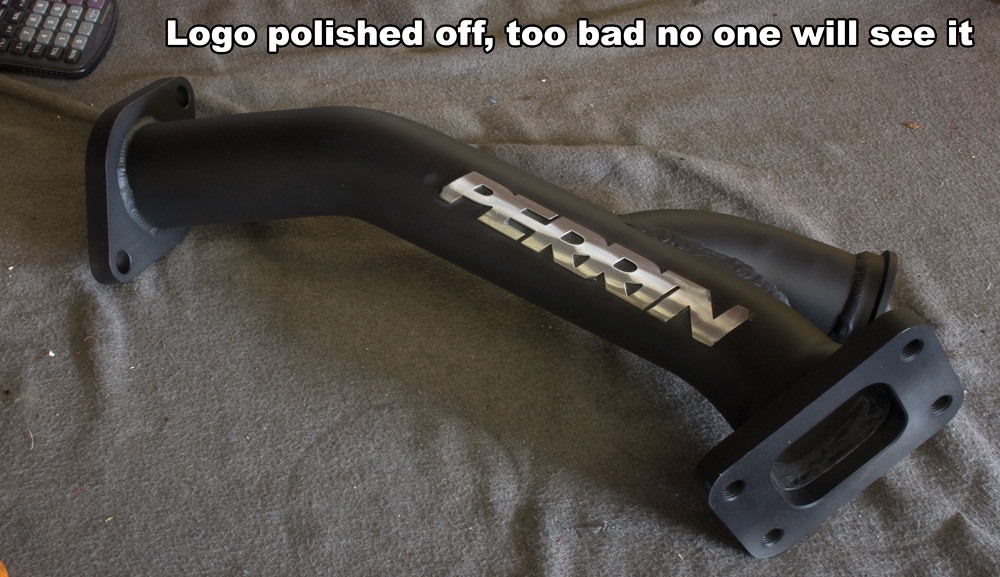
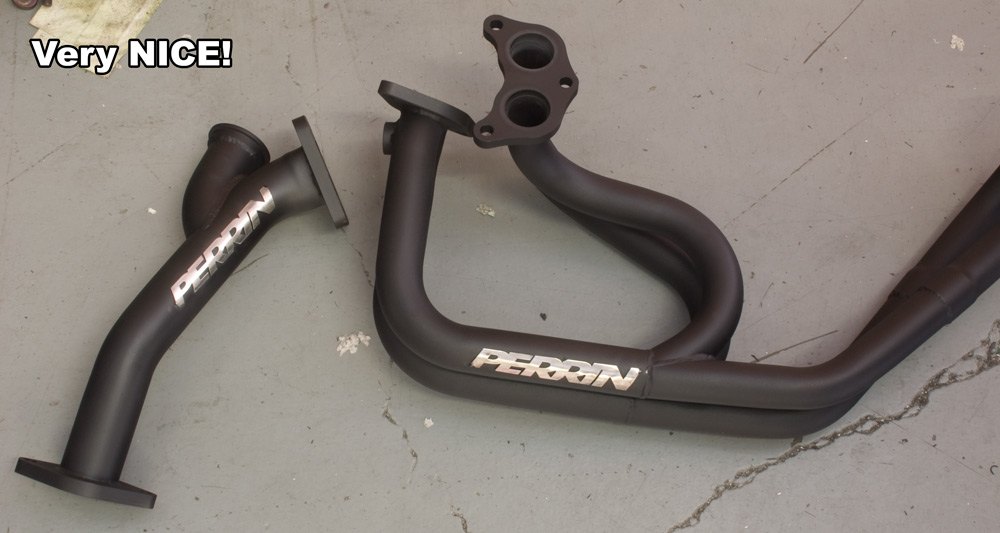
Ya, who cares, no one will see it, but for a couple minutes of work, it made for a nice picture!
SUSPENSION
While Subaru has done some things to make the car handle better out of the box, Subaru has left some room for improvement. Beauty with this car is there is lots of room to put some nice wide tires on it. We could have gone with 255 easily with the correct offset and a little more time. This is something we will be working on very soon. But 245 wide tires on this car is perfect for zero issues with rubbing. Its kind of like 225s on the GD body. I just can€™t wait until the 2008 STI comes out! Dare I say 265 or 275 with no issues??? So what kind of 245€™s would we use? We went with, what I feel to be the best street performance tire around, Advan Neova€™s. They are not quite R compound, but very sticky, and good enough to drive on all year round, and good enough for some light track days. Plus Yokohama hooked us up with set for this event. The only problem was when the tires arrived. To keep the tires connected to the car, we used some Konig Feather wheels. These are just over 17lbs for a 17", and are very reasonably priced.
Starting at the front of the car, the front sway bar and end links fit perfect from the WRX/Legacy GT. We chose to go with a 22mm front bar to help balance the rear sway bar we were building. After driving the car, we might even be putting the 25mm on the front. From there our Legacy GT PSRS plopped right into the control arms. Yes, the 2008 WRX has those stupid super soft rubber rear control arm mounts. This was a huge improvement to the handling as expected, and I think will be one of the most important suspension items for the new 2008 WRX/STI/LGT. Those of you that have this part on their LGT will understand why I say that.
Onto the rear! Of course we are going to build a rear sway bar, but what size??? Well the OEM bar is a whopping 15mm huge, so of course we are making one. But why did Subaru make it so small? Many people will ask this question and thing that Subaru wants to make the car understeer more to suite more of the general public. But after some measurements, Subaru was going the right way, more oversteer! The OEM 19mm GD body rear sway bar, has an effective rate of 85lbs-in, compare this to our 22mm rear sway bar which has a rating of around 240lbs-in on the soft setting. The new 2008 OEM 15mm bar is rated at around 130lbs-in, so its stiffer! How can this be, simple the bar is shorter, and the leverage arms are shorter. Going with a 17mm bar would make the effective rate about 215lbs-in, which might seem like enough. But the STI is about to come out and I am sure it will have a larger(or stiffer) bar than the WRX, because it has in the past. For us, this wouldn€™t be enough, so we went with a 19mm and made it with 3 holes. One hole stiffer, and one hole softer. This made 3 rates, which vary from 260lbs-in, 340lbs-in and 440lbs-in. This allows for settings that can be a mellow change from stock to a change that is more than 3 times stiffer than stock. And the different settings are very noticeable. The softer setting is a nice feature, as this will allow customers to work up toward the super stiff setting.
A prototype 2008 WRX rear swaybar was created, using the OEM bends, and some special laser cut ends. This was sent off to be red powder coated and was had a couple of days later. While installing the sway bar, we threw in one our larger volume diff covers.
All of these parts wouldn€™t really make much difference unless we could lower the car and stiffen up the suspension. This is the one thing that I don€™t like about the 2008 car, its€™ soft suspension. This might be because I am used to driving cars with stiff suspension, and it had been a while since I had been in a WRX, but either way its too soft. But that is a good thing as this gives us something to improve upon. We are a long time dealer for H&R, so we turned to them for coilovers. Of course there is nothing off the shelf that would work so we had them send us a few kits to try to make something work. In the end the exact combination of parts is kept secret, but it worked out great. We could now lower the car to a level that was functional, and looked great. This is when the car really started to look good, and really started to handle good. The suspension was dialed in, except for an alignment. While you should never lower a car and not get it aligned, time was becoming an issue, and it just wasn€™t going to happen.
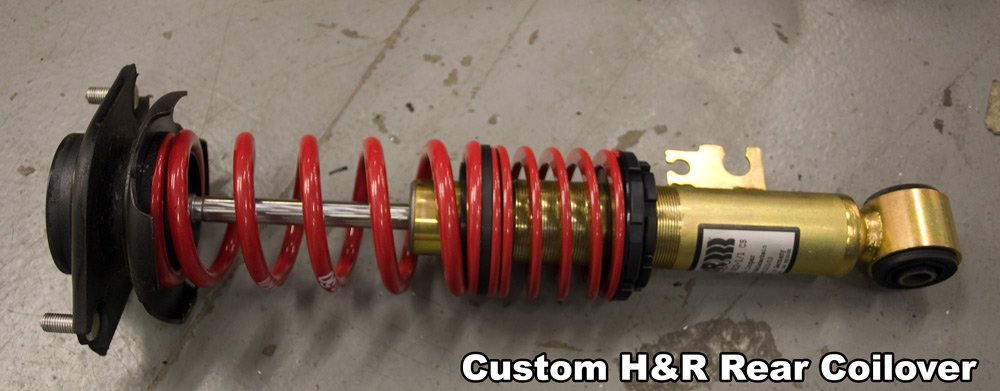
The custom built H&R coilover all assembled and ready to drop in!

These really look sweet on the car!
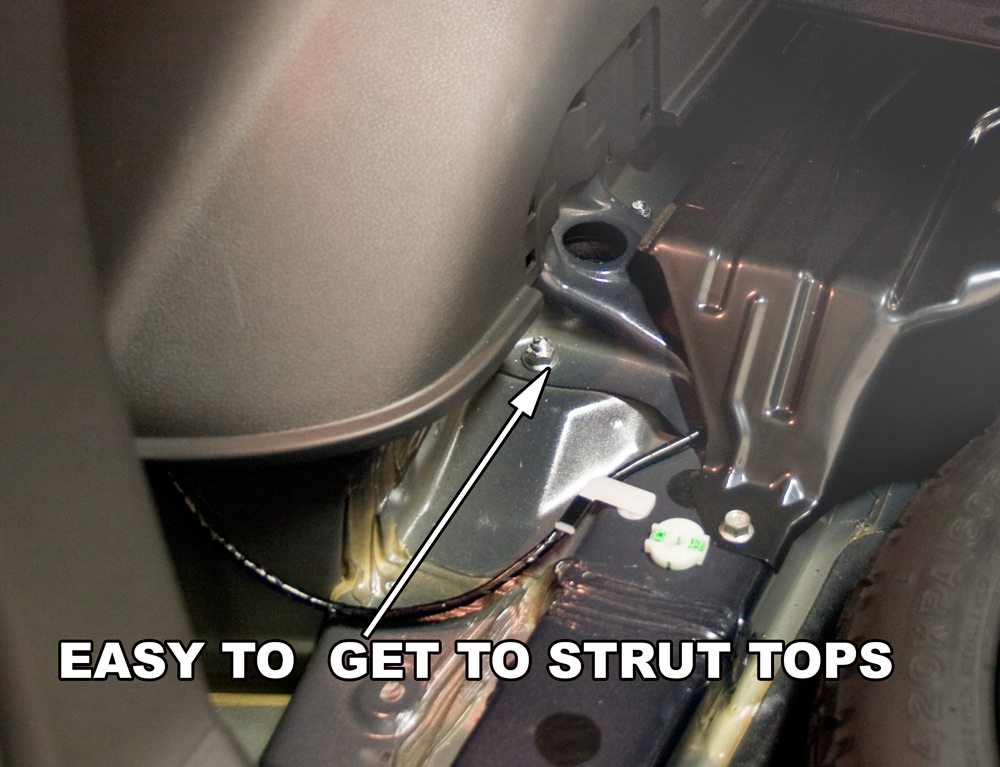
I know, its not the most glorious picture, but this is a nice feature of the new 2008! Now instead of lowering a car in under an hour, i am thinking under a half an hour.
TURBO KIT
So what would power our PERRIN show car? Of course we would not be showing off our car with a stock turbo, or stock location turbo, so the obvious choice is a PERRIN rotated turbo kit. But which turbo is the question. If look at the internet, everything is about the GT3582R turbo. While this is a great turbo to make big power with, and it gets lots of press because it is a widely used BIG turbo, its not my personal choice. The last two cars i had were very responsive, and i had grown to love that. There was no way I was going to go with some laggy GT3582R, that is no fun and makes for a crappy autocross/street car. The GT3076R is another very popular turbo, and we have built plenty of these kits on cars, so that is a boring choice. The turbo for me is the GT3071R, a bit smaller, bit more responsive, and still able to make 400WHP. We always tell people that buy the smallest turbo that supports your HP goals, and while our show cars never really follow these guidelines, this one would be! We would showcase the power that can be made on pump fuel and then on water injection.
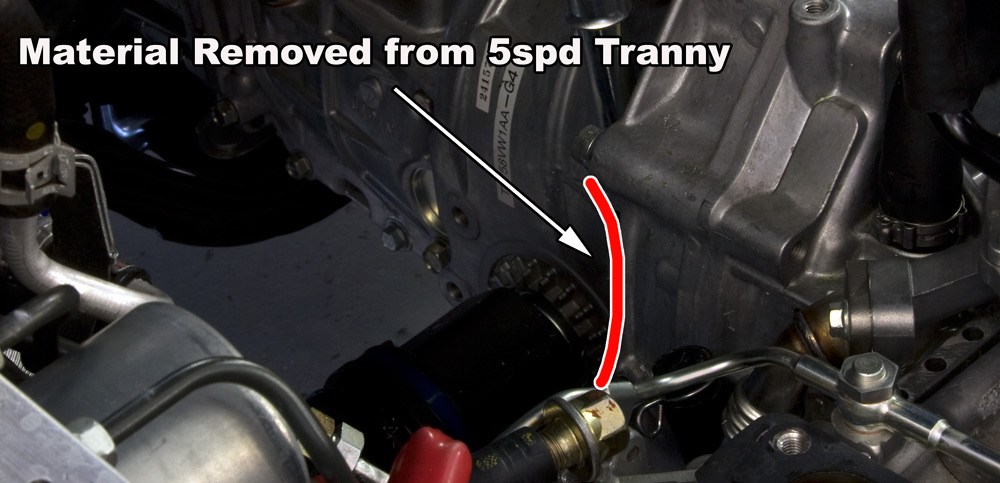
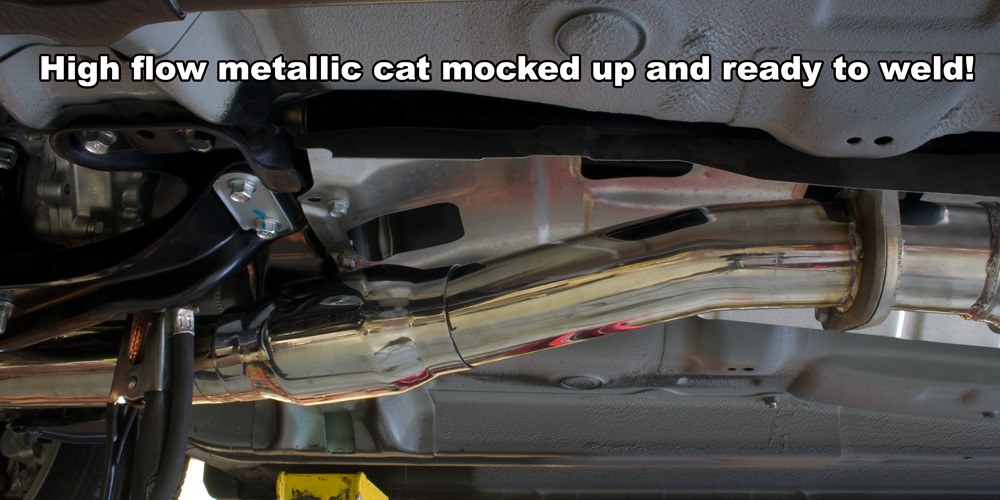
Installation of the turbo kit involved creating a new downpipe which is longer and modified to clear the fire wall. This change in the downpipe also makes for a turbo fitment for the Legacy GT, so be on the lookout for that also. The single most important part of the turbo kit changes was adding a CARB approved catalytic converter to it. Another important thing we like to do is prove that you can make power with cats. Many people out there think that the only way to make power is by getting rid of cats. This is not the case and with our last couple of PERRIN project cars, we had cats installed, and they both still made great power.
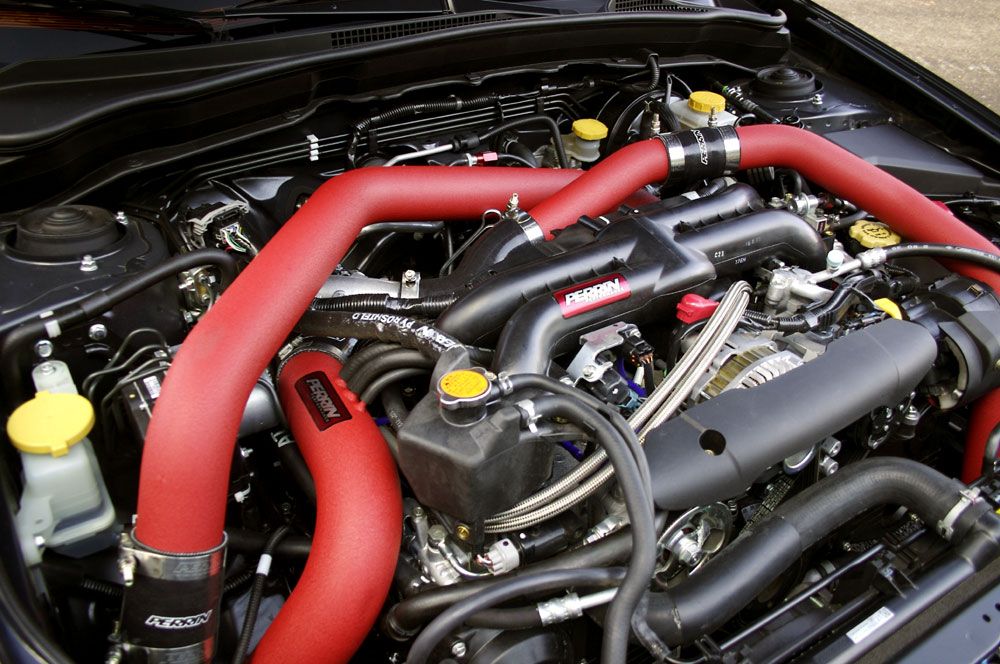
With the rotated turbo kit being installed on the 2008, we quickly discovered that the intake system had to be completely changed. So a few 3" bends, welding, and more of that red wrinkle finish! Like our other new turbo kits, the filter was located in the fender well area to get the freshest coolest air possible. This is another theme you will see from us. More cold air intake systems. But before we go and build that, we need to finish the front mounted intercooler pipe to ensure it all fits together.
FMIC
The starting point to the FMIC is getting the intercooler mounted to the car. Starting with a Legacy bumper beam from our LGT intercooler, I quickly found that this wouldn€™t, although it was close. Couple of simple cuts, some welding, and beam done.
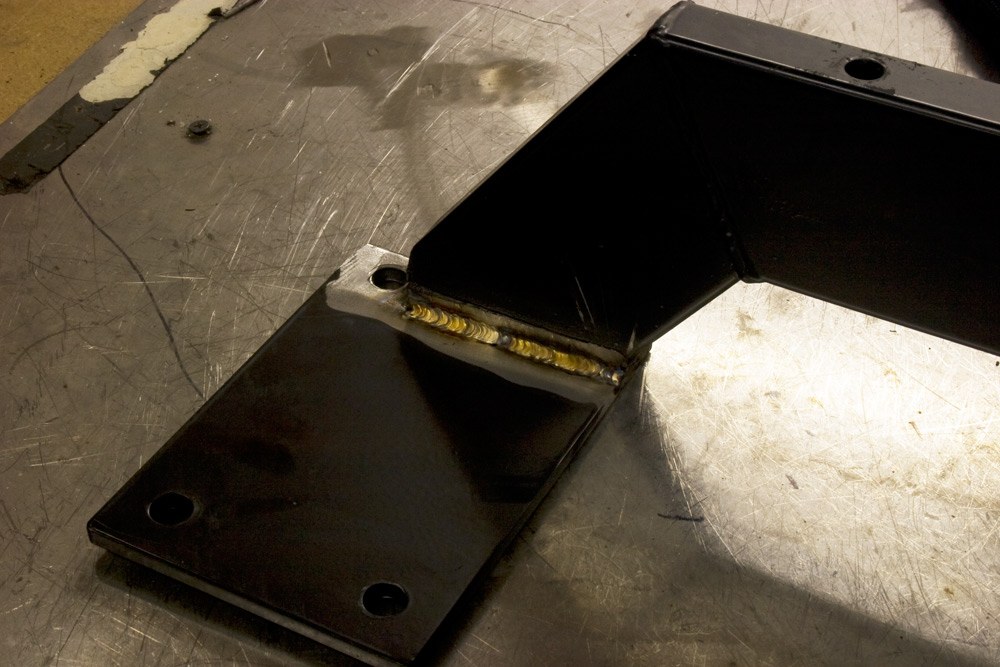
In order to get the intercooler to fit, I had to modify some of our WRX tanks to allow it to fit tighter to the beam. I just grabbed a set with no holes and redrilled them where i needed it.

This is an angle most people don't see with our intercooler tanks. Notice the nice smooth insides, not gonna see those ever again!
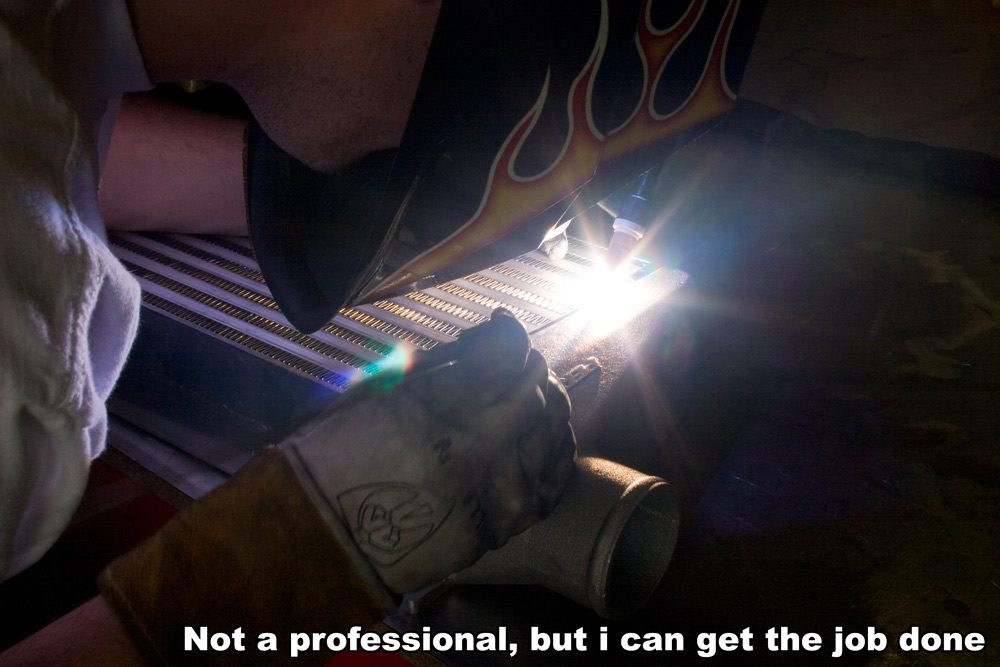
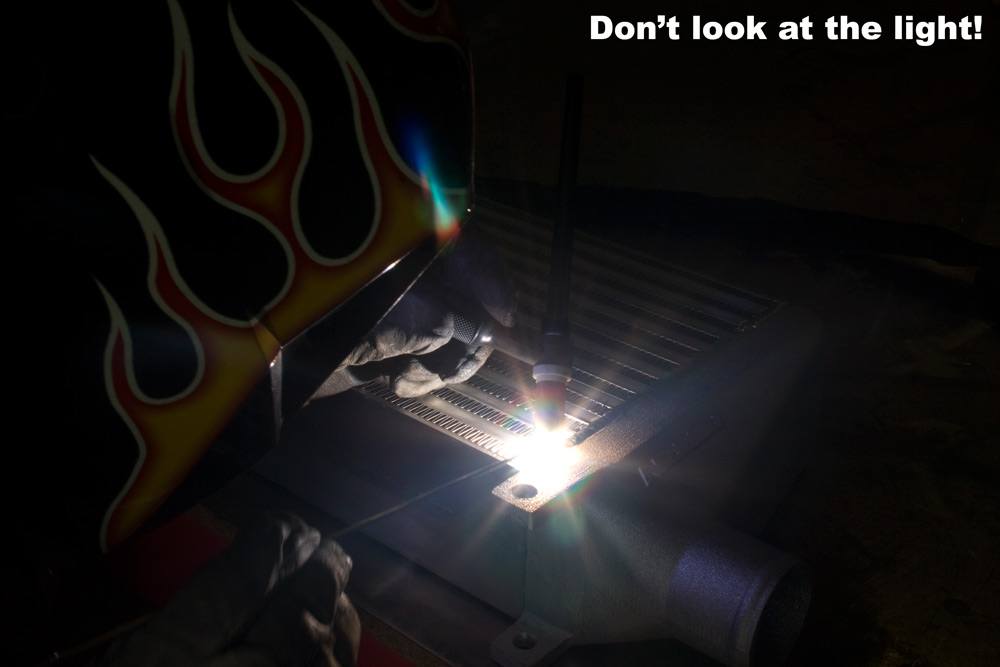

With the core mounted to the chassis, plumbing was next. Every tube on the 2008 WRX FMIC is completely different than any of our other FMIC€™s, and in an effort of time the prototypes we made would have to be made to look like the final product. A little welding, grinding and off to the powder coaters they went. But before they left we finished the turbo kit intake piping and sent all of it out at the same time. A week goes by and they showed looking perfect, STI wrinkle red!
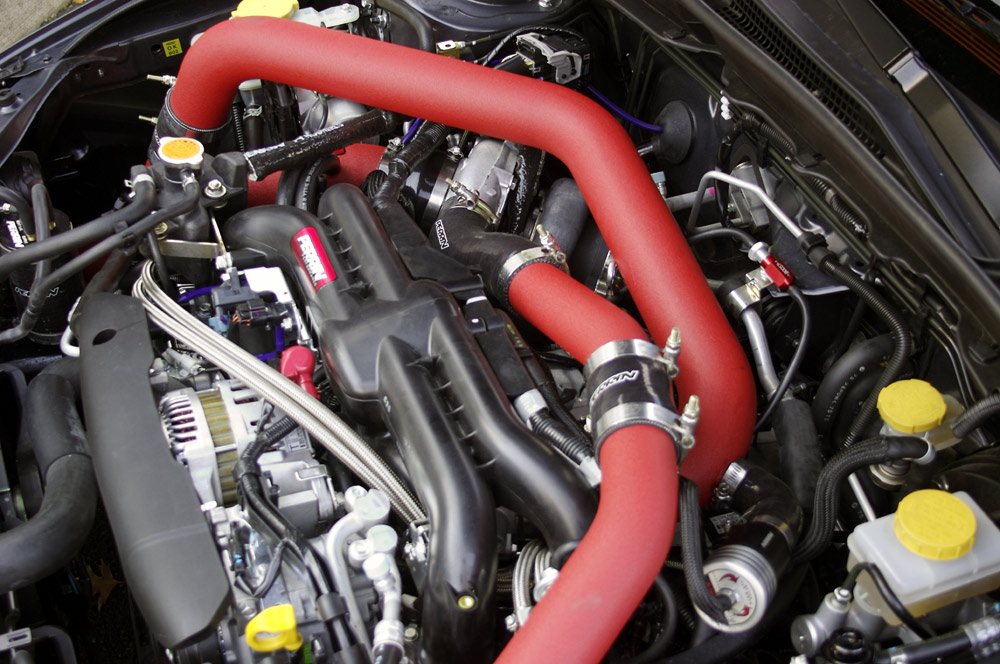
Now we can finish the intake system! Just like the boos tubes, the protos had to become the final product, so more welding and grinding!


Its a tight fit, but the filter does fit down there very nicely.
FUEL SYSTEM
Of course to support the potential power, we need fuel. We would be using our high flow fuel rails and modded injectors. The modded injector thing still is not very well acknowledged in the Subaru world (even though they have been around for a few years). We have had very good success with this simple and very effective way to increase the size of the injector, so like the last 5 cars I have built this one would be using them also. The 2006 WRX+ injectors are a top feed style that in stock form flows 540CC/min of fuel. But like all the other Subaru top feed injectors, these for 800cc/min when modded. Many people claim that these injectors have bad spray patterns, and cause poor fuel economy. This is just not the case, and people that tell you this are people that have not used them before. Then of course the good old Walbro Fuel pump would be used in place of the OEM fuel pump which probably doesn€™t flow enough to make anywhere near 400WHP.
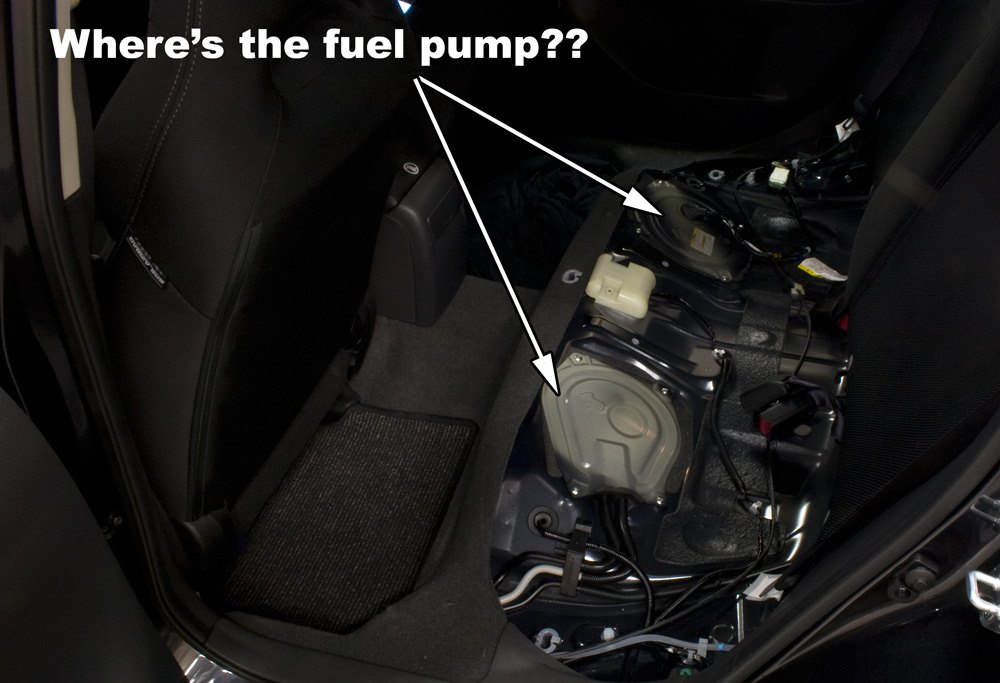
With the intake manifold removed, and rails installed, it was time to install the fuel pump. Should only take an hour, right? Above I mentioned that Subaru moved the tank under the seat but this was discovered during this part of the installation. First I pulled the back of the car apart to find that Subaru shoved all the emissions stuff where the fuel pump used to be. This is where I found the pump under the seat. Take note that, before you install a fuel pump, make sure that you just didn€™t fill up the night before. This is messy!! But it does make the shop floor really clean under the car!
Now I have not done an install of a fuel pump on a legacy GT, but how hard could it be??
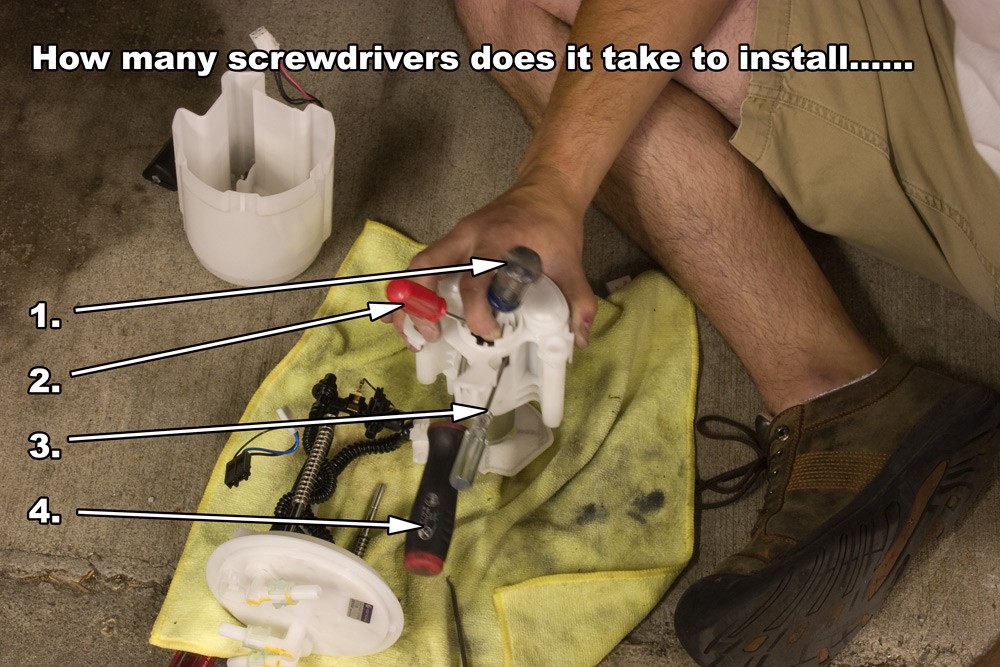
Well it all would have worked out just fine, but the only pump we had I broke off the nipple from the output fitting, while installing the o-ring adapter from the OEM pump. Since we didn't have one sitting around, and we were strapped for time, we would be putting the OEM fuel pump to the test! Could it do 400WHP??
ENGINE MANAGEMENT
The only way this whole car will run is with some good engine management. We turned to Hydra again for a custom made ECU for the 2008. Andrew sent us 2 harness to try out on the car. The first one was a harness that completely did away with the OEM ECU. This would have worked fine, but all these new cars have immobilizers which will not let the ignition switch work without the OEM ECU being turned on. So the second harness was a special pass through harness that kept the OEM ECU in place. I created a base map using Hydra€™s 2006 WRX base map and a fuel map from tune a long time ago. The car fired right up and it was time to take it for the maiden voyage!
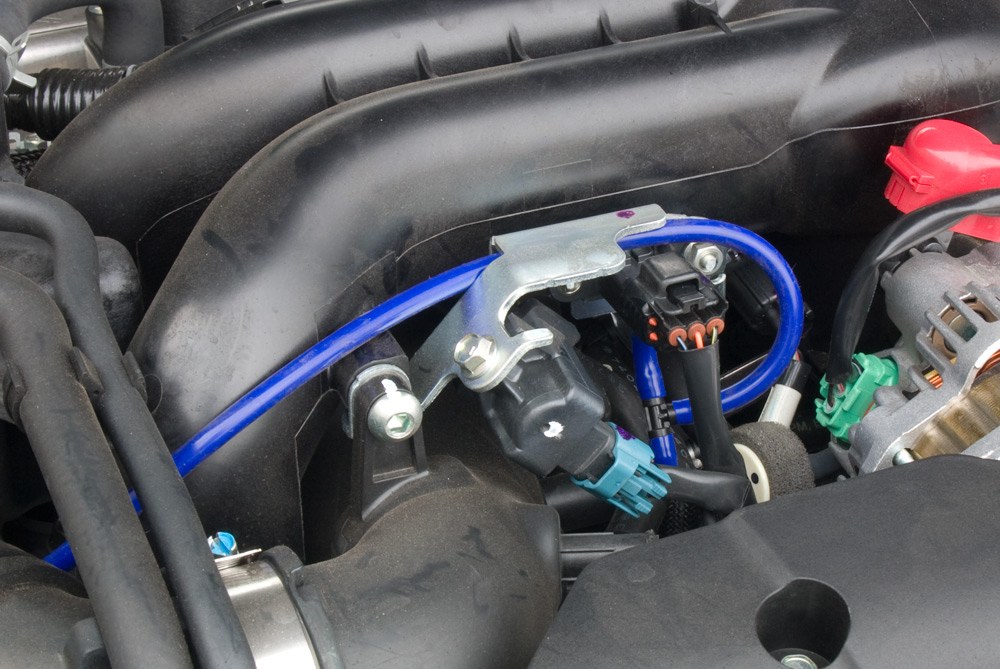
The Hydra has a MAP Sensor built into the ECU itself, so it was necessary to run a hose into the car.

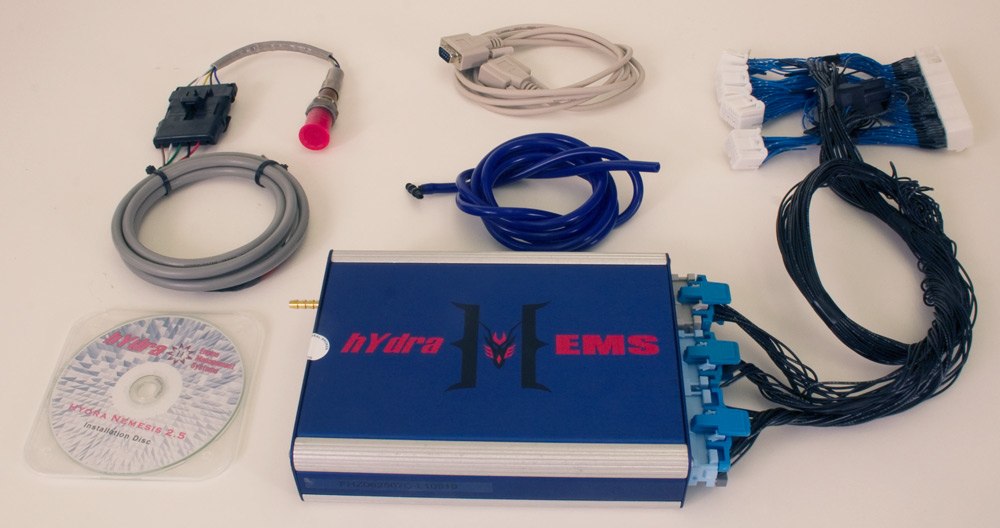
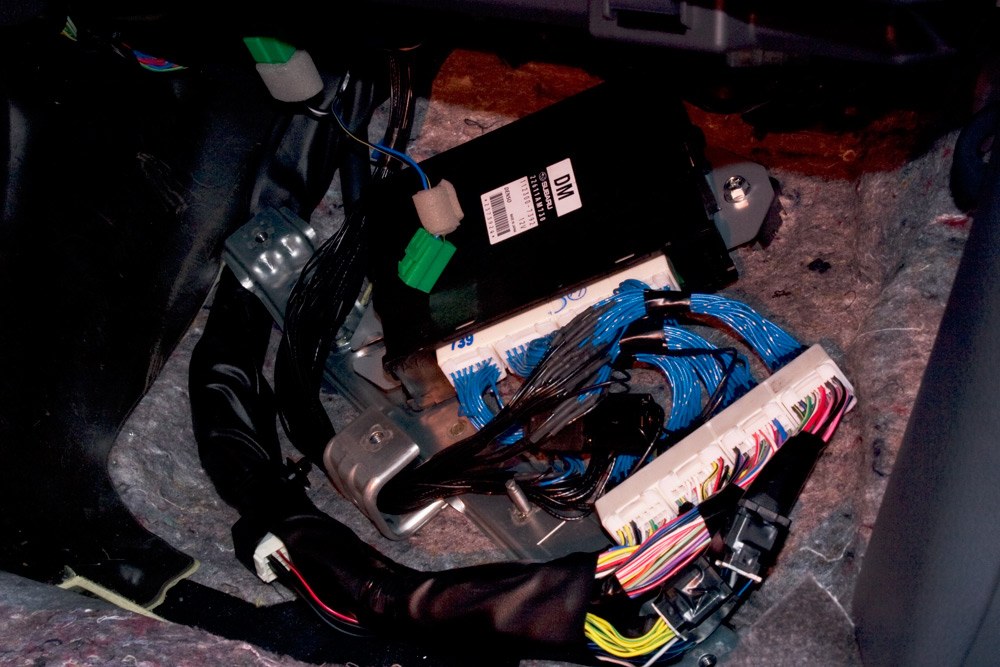
The Hydra is installed in the glove box, and the pass through connector is under the carpet.
TIME TO LEAVE
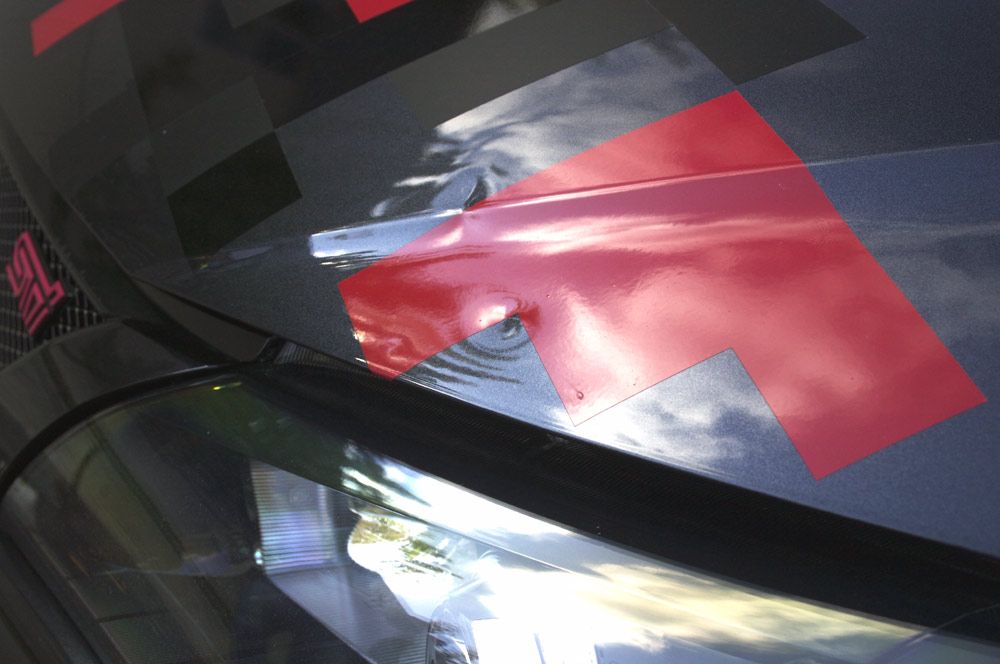
The car was finally done, and with a couple days to spare. Now it was time to pack and get some sleep. Wait, there still is the outside of the car!! When ever we do graphics on a car, things just seem to work out. Digital camo seemed to be a popular thing this year, so lets do something like that John Herring said. This goes great with the shirts he just made and should be pretty cool looking. John started cutting out random square shapes a few colors, and things just started falling into place. We used matte black, glossy black, and red. As shadows appear, and the lighting changes, the 3 different colors change and produce a totally different looking car. While these pictures show the basic sceme, they don€™t show how cool it looks in person.

And just like most projects on a tight time schedule, we got her done just in time€¦..except for the tires. While we carefully watched our tracking number for the tires the week prior to leaving, we started to wonder why they hadn€™t moved from California for a few days. A quick call to Yokohama, and they said they screwed up and had to Next day air some tires. No problem, it just meant the day before we left, we would be running down to Americas tire and getting some tires installed on our Konig Wheels. While we patiently watched the tracking number again, Monday comes and nothing!! They didn€™t get picked up until Monday!! DAMN! Ok, this just meant, we would be getting tires mounted the day we were leaving. Ok, its tomorrow, we are all stress out about the trip, and again we are watching the tracking number (not very confident in what its saying). After the 3rd Fedex truck, finally tires!! Wait, how many tires does a motorcycle take. Ya, TWO tires, that is what we got!! Alright, this is not good. Again there was a shipping issue with the tires and 2 more were shipped out but this time shipped to an Americas Tire in Las Vegas. We would just have to have them installed there once we rolled into town.
PIC OF FAKE FEDEX DRIVER DELIVERING 2 TIRES
Since we left about 12 hours later than we wanted to we decided to drive straight from Oregon to LV without stopping in Utah like we always do. The rest of the story is pretty boring until we finally got to the track. We went into this event knowing that we were not there to win, but rather test the 2008 WRX, and show it off to the public. I think we did a good job, as finally I started to hear people say €œI can€™t belive that is the 2008 WRX!€. Proof that we did a good job of building the car. With the worry over regarding what the public might think, a new worry was starting to churn my stomach. TRACK TIME!!
AT THE TRACK
You might think that we have time to do lots of track days every year, but this has not been the case for the last few years. While I wasn€™t really worried about crashing or anything like that, I was worried about the car and how it would perform. Mainly because there was no alignment, no one had a tire gauge or pump, and the ECU was only street tuned with a few full throttle runs. Because of the state of tune the car was in, and those things said, overall the car felt great. It was pretty fast and running 16psi of boost it felt like a 350WHP car, and spooled around 3700RPM. I was pretty happy as we I could tell there needed to be an alignment. With visually 0 to 1 degree of negative camber, and who knows what toe in or out it had, it had mild under steer in the tight twisty corners of Spring Mountain. The car kept up with some of the faster EVO€™s and other random cars at the track. For a session or 2, I was going faster than an Ariel Atom, but I think he was taking it easy, as this car should have blown everyone away. Over all the car was pretty fast, but bringing the car to a haltNow with some seat time at the track, and a new alignment, this car might be somewhat competitive. Maybe you will see it at the upcoming Redline Time Attack.
PIC OF CAR ON TRACK
After the event, we felt great that the car was very well excepted by the public, and that it did just fine around the track. But like all events, nothing ever goes perfect, and the only real issue we had, was a box in the trailer coming loose and landing on the car. Bummer! Our good buddy Jason can take care of this no problem.
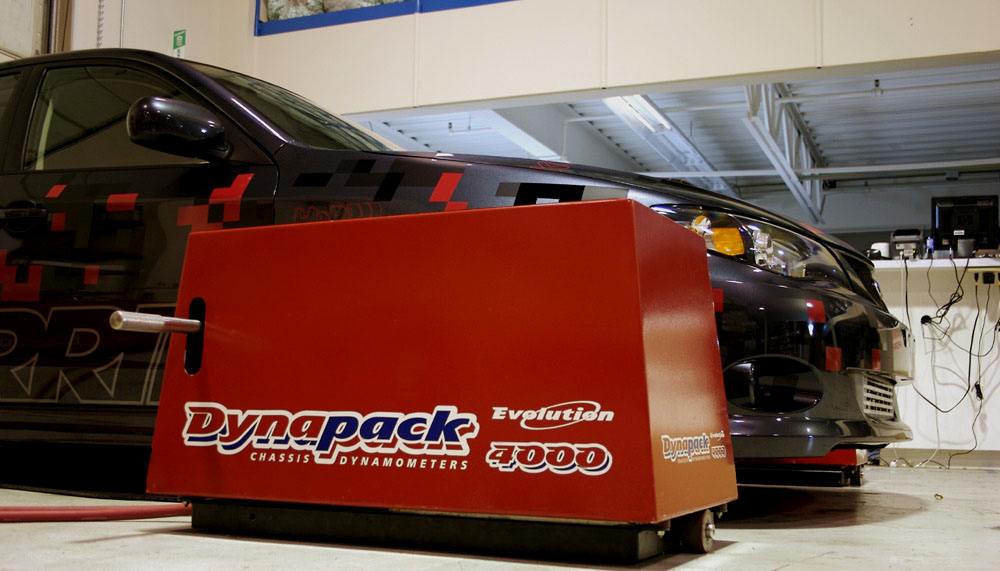
DYNO TIME
READ HERE FOR 2008 WRX TEST AND TUNE ARTICLE
So how much WHP did our car make at the track?? Just before we left, we took delivery of a dyno (yes its been a long time coming), but there just wasn€™t time to set the car up and do a base run, so it would have to wait until we get back. Well we are back and the results were very surprising. As expected the GT3071R makes a little less HP than a GT3076R, but spools quicker. This was the reason why I chose this turbo, better response for autocrossing and normal driving. The car makes almost 340Ft-lbs of torque, and 320WHP. This was at the 16psi we ran at the track, and no wonder why we were keeping up with cars we thought were way faster. When tuned to 18psi we made 365WHP, and 375ft-lbs of torque, while this is a good safe place to leave the car for engine durability issues, we have to push the car a little to see where this turbo starts to loose its breath. At 21PSI, we made 385WHP, and 390FT-lbs. Plenty of power for a street car!
WHAT€™S LEFT TO DO???
Besides wait for an STI to come our way, this car needs a wing badly!! Wait till you see what we have in store!! Besides the wing, the car needs a little more love to get the suspension dialed, and I think its ready for more competitive track time. We will just have to wait an see if it makes it to the Redline Time Attack!
PERRIN CATALOG PARTS
While all these parts were created for our 2008 Show car, what would we be building for our catalog of parts?? Well, everything!! All of these items along with our normal mix of parts are all in development and should be ready by the end of the year. This is of course the new parts that had to be created, but there are many current parts that fit the 2008.
What did we have already for our build?
Front swaybar, front end links, fuel rails, injectors, PSRS, downpipe (for stock turbo, but not used), R160 diff cover, WRX short shifter, Shifter bushings, Crank pulley, EBCS, VTA and Recirc BOV€™s, gauge pods
What did we have to build?
FMIC, turbo kit, rear swabyar, rear endlinks, turbo back exhaust,
What parts we plan on making.
Sub frame brace, rear diff lockout, rear control arm bushing replacements, intake systems for OEM turbos, PERRIN custom tuned AccessPORT systems,
Parts installed on our show car.
FMIC, turbo kit, exhaust system, intake, PERRIN parts installed
PERRIN 2008 WRX FMIC
PERRIN 2008 WRX GT3071R rotated turbo kit
PERRIN 2008 WRX Rotated turbo intake
PERRIN 2008 WRX 3€ Turbo back exhaust system
PERRIN 2008 WRX Positive Steering Response System
PERRIN 2008 WRX 19mm sway bar
PERRIN 2008 WRX Endlinks
PERRIN 2008 WRX Short shifter and Shifter bushings
TIAL 44mm Wastegate
Custom Hydra standalone ECU
Custom H&R Coilover
Konig Feather black wheels
Advan Neova 245/40/17s
Look for more information about the 2008 over the next few weeks! Feel free to call us with any questions about 2008 Products or fittments.